Let us run with endurance the race God has set before us. We do this by keeping our eyes on Jesus, the champion who initiates and perfects our faith. Heb 12:1-2 (NLT)

Monday, May 31, 2010

Oven-roasted Cod

Ease: 3.5/5     Kid-friendliness: 4/5     Taste: 3.5/5     Time: 3.5/5


I am learning all about fish these days in an effort to include more of it in our diet. Problem is, I'm a very picky fish-eater. I prefer fish coated and this simple method can be used for any firm fish. Both of my kids loved it.

See "Tips and Tricks for Cooking with Fillets", for more information!

What you'll need:
  • 4 cod fillets (6 oz each)
  • 1/4 tsp salt
  • 1/8 tsp freshly ground black pepper
  • 1 C crushed bread crumbs
  • 1 Tbsp chopped fresh (or dried) parsley
  • 1 1/2 tsp chopped fresh (or dried) chives
  • 2 Tbsp margarine, melted
Preheat oven to 435 degrees F

Brush fillets with margarine; sprinkle with salt and pepper. 

Place bread crumbs in resealable freezer bag. Seal bag and place on flat surface. Crush crumbs by rolling and pressing rolling pin over bag (I use a tea towel underneath to help prevent the crumbs from puncturing the bag).

Combine breadcrumbs, parsley, chives, and 1 1/2 tsp margarine in a small bowl; toss well. Spoon breadcrumb mixture over fillets, pressing down gently. Drizzle with remaining margarine.

Bake at 425 degrees F for 8 to 10 minutes or until the flesh flakes easily when tested with a fork.

NOTE: You could also BBQ the fillets in foil over high heat (which is what we ended up doing - getting maximum use out of our new BBQ!).


Sunday, May 30, 2010

Tips and Tricks for Cooking with Fish Fillets

Growing up, I didn't eat much fish. My mom didn't like it and I always assumed, to my dad's frustration, that I didn't like it either. It wasn't until I was in college that I realized, fish is okay. My relationship with it is improving. Given it's health benefits, I have been making an effort to include more of it in our diet.

I am creeped out by the idea of fish eyes staring back at me when I cook, so for now I am sticking with fillets. Here are some tips and tricks for cooking with fish fillets that I've come across in my search for recipes.
  1. A fillet is a boneless or nearly boneless piece cut lengthwise from the sides of the fish. It may or may not have skin.
  2. When shopping for fillets, fresher is better. Look for vibrant flesh. If there is still skin on the fish, it should be shiny. Give it the smell test - it should not have a pungent or overly fishy smell. If there is any liquid on the flesh, it should be clear, not milky.
  3. Fish perishes quickly. Only store it in your fridge for a day or two. If properly sealed, and kept in a deep freeze, fish can keep in the freezer for up to six months. When thawing frozen fish, thawing it in milk helps keep the fish tasting fresh (don't ask me why).
  4. Sturdier/fattier fish (such as grouper, salmon and tuna) are better for grilling, as they practically baste themselves. Thinner cuts are great for frying or baking. Lean (such as cod, haddock, sole or halibut) fish can dry out at high temperatures, so a protective coating is a good idea when frying. 
  5. To remove skin from a fillet, make an incision near the tail, hold firmly and cut down at an angle with the knife. 
  6. Rinsing fish in cold water and lemon juice helps to maintain its color and enhance its flavor.
  7. Once you start cooking your fish, leave it be! Turn only once (fish less than 1/2 in thick do not require turning). This helps develop a nice crust on the fish.
  8. A general rule for cooking fish fillets, is to cook it 10 minutes for every inch of thickness.
  9. Fish can easily be overcooked. Remove fish from heat a couple of minutes before end of estimated cooking time as it will continue to cook after you have removed it.
  10. Many fish-eaters prefer tuna and salmon when it is still raw on the inside. This is not my cup of tea. The best way to check for doneness, is to use a thermometer. Cooked fish should have an internal temperature of 145 degrees F. You should remove the fish from the heat source when the internal temperature is around 140 degrees F, to avoid overcooking. Flesh should be opaque, firm, moist, and easily separate or flake. 
  11. Don't be afraid to experiment with different herbs, spices and flavored butters, but try not to overwhelm mild tasting fish. 
  12. Lastly, I always make "fish night" the night before garbage pick-up. That way all the packaging, skin, etc. doesn't sit around stinking up the kitchen or garage.

Coming soon: a simple way to prepare oven roasted cod!

Sources:


Friday, May 28, 2010

Spaghetti Carbonara & Friday Follow Me

Ease: 4/5     Taste: 3.5/5     Kid-friendliness: 0/5     Time:4/5


I gave this recipe a zero for kid-friendliness because it involves cooking with alcohol, and raw eggs. Well, you add hot spaghetti to the raw eggs which I assume (or at least it's what I told myself...) cooks the eggs (but could that REALLY have cooked the eggs??).

With a fresh loaf of French Bread, this recipe would work great for a date night or if you have last minute company and you want an adult tasting meal quickly, and without a ton of ingredients.

Truth moment: I popped mine in the microwave for a minute which sort of ruined the flavour but saved my sanity over the raw eggs. The following day, I added a bit of milk and some butter to the leftovers and warmed them in the microwave  and thought it tasted even better!

What you'll need:
  • 3 Tbsp olive oil
  • 125 g (1/4 lb) chopped bacon
  • 2 large cloves garlic, minced
  • 1/3 C dry white wine
  • 3 eggs at room temperature, beaten
  • 1/3 C parmesan cheese, grated
  • salt and freshly ground pepper
  • 1 lb spaghetti
  • 1/4 C fresh parsley, minced
To make the sauce, bring a large pot of water to a boil. In a large frying pan over medium heat, warm 1 Tbsp oil. Add the bacon and 3 Tbsp water and cook until the water has evaporated. 

Add the garlic and remaining oil and cook until bacon is slightly browed (~ 4 min). Stir in the wine and cook about 1 minute. Set aside. 

In a large serving bowl, beat the eggs with the cheese and 3/4 tsp salt; set aside.

Meanwhile, add 2 Tbsp salt and the pasta to the boiling pot of water. Cook, according to package directions. Drain, reserving 1/2 C of the cooking water.

Working quickly, add the hot pasta to the egg mixture and toss to combine. Add the cooking water slowly until a nice consistency for the sauce is achieved. 

Add the bacon, a generous amount of pepper, and the parsley. Toss again and serve.

Recipe from one of my favorite cookbooks: Williams-Sonoma The Weeknight Cook: Fresh & Simple Recipes for Good Food Everyday

Also, today marks participation in the NEW Friday Follow Me Party! And I know you wanna!

friday-follow


Thursday, May 27, 2010

Sausage and Chickpea Casserole

Ease: 3.5/5     Kid-friendliness: 4/5     Taste: 3/5     Time: 3/5


Since we were just out camping over the long weekend, I had some left over smokies and wanted to make something a little more sophisticated than KD with chopped up smokies (although, that dish does have it's time and place...). I ended up with this. It's very filling. My nearly ten-month old LOVED the chickpeas.

What you'll need:
  • 4 sausages (I used our left over Mitchell's mesquite garlic smoked sausage)
  • 2 Tbsp olive oil
  • 1 small yellow onion, diced
  • 1 red bell pepper (which I've learned are also called, capsicums!), seeded and chopped
  • 2 cloves garlic, minced
  • 1 can chickpeas (14 oz) (which I've learned are also called, garbanzo beans!), rinsed
  • 1 can diced tomatoes (14 oz)
  • 1 1/2 tsp sugar
  • salt and freshly ground pepper
  • 1 C bread crumbs
  • 2 Tbsp margarine
Preheat oven to 400 degrees F.

Slit each sausage diagonally several times on both sides. In a frying pan over medium heat, cook the sausages, turning once, until browned on the outside and heated through (~10 minutes)

In another large frying pan over medium high heat, heat the oil. Stir in the chickpeas, tomatoes, onion, garlic, red pepper, and sugar.  Bring to a simmer and cook, stirring frequently, until the chick peas are heated through (~ 5 minutes). Season to taste with salt and pepper.


Cut the sausages into bite-size pieces. Spray a 3-qt casserole dish and distribute the sausages in the pan. Spoon the chick pea sauce over the sausages. Spread the bread crumbs on top and drizzle with melted butter. 

Bake until bubbly and the crumb topping is golden brown (~ 20 minutes). Let cool slightly and serve!


Tuesday, May 25, 2010

Breakfast Smoothie

Ease: 4/5     Taste: 5/5     Kid-friendliness: 5/5     Time: 5/5


This is what I got to stare at all weekend:


I sacrificed warmth and sleep to do so, but even bad weather camping is good camping. But as those of you who camp know, coming home sucks. Everyone is grumpy and all your stuff is dirty and smelly. Nobody in this house felt much like making breakfast this morning. Smoothies are my go-to when I don't have the time or ambition to make "food" for breakfast.

The downside to smoothies is that I never feel satisfied for long. This smoothie recipe adds oats and I find they help to keep us feeling fuller for longer.

What you'll need:
  • 2 1/2 C skim milk
  • 1 C frozen fruit (I used mangoes this morning)
  • 1 banana
  • 1/4 C sugar
  • 1/2 tsp coconut-flavoured extract
  • 1 tsp vanilla extract
  • 1/2 tsp ground cinnamon
  • 1/4 C quick-cooking oats
  • nutmeg (optional as a garnish - I prefer to garnish with cinnamon)
Place all ingredients in a blender, and puree until well blended. Divide among 4 tall glasses and garnish with nutmeg or cinnamon. 

Recipe variation: I often like to substitute a cup and a half of juice (berry or apple is my favourite) and a hand full of ice for the milk and 1/4 C of sugar. Makes the smoothie a little more slushy - great for hot days!


Adapted from Karen Bellerson's Low Fat, No Fat Cooking

Sunday, May 23, 2010

Tips and Tricks on Making S'mores

The S'more. A staple in camping culture. A s'more (as in "some more, please") is not difficult to make, and some might say there is no wrong way to make one. Which is nearly true, with one exception: I really do not think microwaved s'mores are the same.

Here are the basic steps to s'more success...

What you'll need:
  • 1 box of graham crackers
  • 1 bag of large marshmallows 
  • 3-5 bars of hershey milk chocolate bars
  • paper towel (baby wipes work better), for cleaning your hands afterward

Have a campfire going. The only true way to make a s'more is over a campfire.  (Waiting until the fire has burned down and there are lots of glowing embers is best).

Upon a graham cracker, lay enough chocolate (I use about 3 pieces) to cover cracker.

Toast the marshmallow until golden brown. I find it's easiest to go marshmallow by marshmallow instead of roasting multiple marshmallows at a time. This helps to ensure the marshmallow is hot enough to melt the chocolate.

Using another graham cracker, push the marshmallow off of the roasting stick onto the piece of chocolate. Top with the graham cracker and smoosh to ensure complete chocolate meltage.

Let cool (many a tongue have been burned!). Enjoy! Serves ~5.

Friday, May 21, 2010

Turkey Vegetable Chili

Ease: 3/4     Taste: 5/5     Kid-friendliness: 3.5/5     Ease: 3.5/5     Time: 3.5/5

Camping Chili!


There's a lovely spot in the mountains we traditionally go to every May Long Weekend (this will be our first camping trip with TWO kids, and in typical Alberta fashion anything can happen with the weather, so wish us a ton of luck!). Every camping trip we take, I like to bring a big pot of this chilli with us. It's more only mildly spicy, making it kid-friendly, and it's fairly quick as far as chili's goes, plus packed full of veggies, giving it two thumbs up. I like it with mushrooms, but my husband gives me grief when I include them, so this recipe is without.

What you'll need:
  • 1 lb ground Turkey
  • 1 can (398 mL) diced tomatoes with juice
  • 1/2 green pepper, diced
  • 1/2 red pepper, diced
  • 1 celery stalk, diced
  • 1/2 C corn
  • 1 can red kidney beans, rinsed
  • 1 can brown beans (in molasses or tomato sauce) 
  • 3 Tbsp Chili powder (or to taste)
  • 1 package Safeway Select vegetable beef soup mix
In a deep skillet or Dutch oven over medium-high heat, cook turkey, breaking up with a fork until all pink is gone.

Stir in tomatoes with their juice, chili powder, soup mix, vegetables and 3 1/2 C water. 

Reduce heat to medium and simmer, uncovered, stirring occasionally until veggies are tender and sauce is thickened, about 20 minutes

Add beans and heat through. 

So good!

(By the way, is it "chili", or "chilli"? I never know.)


Wednesday, May 19, 2010

Health(ier) Chicken Nuggets

Ease: 2.5/5     Kid-friendliness: 5/5     Taste: 4/5     Time: 3/5


My daughter LOVES McDonald's chicken nuggets. We have one whole drawer in her toy shelf dedicated to McDonald's toys. Which told me, we probably go there a little too often. So I searched around for a healthier option for nuggets.

I'll start by staying that I thought these tasted better than McDonald's nuggets and they may save you some fat, but they don't save you any time or effort, which is the whole reason we go to McDonald's in the first place. But if you or one of your family members has a craving for nuggets, but don't want the extra fat, these will satisfy. My daughter seemed to eat them with as much enthusiasm as the restaurant ones anyhow.

I used a heavy freezer bag for rolling the bread crumbs, but even then the crumbs punctured it, so have a second bag handy to transfer to once the crumbs are rolled out. Rolling them on a tea towel helped (if anyone has a better suggestion for crushing bread crumbs, let me know!).

What you'll need:
  • 1 3/4 C herb seasoned crumb stuffing mix
  • 1/4 C grated parmesan cheese
  • 3 Tbsp margarine
  • 1/4 C low fat buttermilk
  • 1/4 tsp ground black pepper
  • 2 boneless, skinless chicken breasts
Preheat oven to 450 degrees F

Measure stuffing mix into resealable plastic bag. Seal bag and place on flat surface. Crush crumbs by rolling and pressing rolling pin over bag. 

Open bag and add parmesan cheese. Reseal bag and mix thoroughly.

Melt margarine (in microwave on high for 45-60 seconds or in saucepan on stove over low heat). 

Place melted margarine, buttermilk, and pepper in medium shallow bowl. Stir well. Set aside.

Rinse chicken breasts and pat dry with paper towel (not sure if this step is really necessary).

Place chicken on cutting board and cut with small, sharp knife into 16 chunks of equal size (about 8 pieces per chicken breast)

Dip each chicken chunk into buttermilk mixture, let drip, place 3 dipped chunks at a time into bag of crumbs. Seal bag and shake until chunks are coated. 

Place coated nuggets on an ungreased baking sheet. 

Place baking sheet in oven. Bake nuggets for 4 minutes, then turn and bake for another 4-5 minutes (I had to cook mine closer to 15 minutes before they were done) until golden brown and chicken is no longer pink. 

Serve!

Tuesday, May 18, 2010

Things my daughter says that I don't have the heart to correct...

My daughter is nearly 3 and giving her father and I a run for our money these days. As everyone knows, kids this age say some pretty amusing (and embarrassing) things. Here's a sample of a few that I can't bring myself to correct:
  • She calls a computer a “piano”; 
  • She calls her nipples “buttons". Like a belly button;
  • Anyone wearing a dress is a ballerina or a princess;
  • She thinks any service or trades person who comes to our door is "Bob the Builder";
  • She thinks the letter "M" is pronounced like "bah-bah-bah-bah-bah!"
-    McDonald's has some brilliant marketing people. Brilliant. We can't go to Wal-Mart without immediately hearing "Mommy, I'm hungry. We need some bah-bah-bah-bah-bah, you think?". We can discuss my role in this later, but if it weren't for their commercials, that lovely little melody wouldn't have been one of the first songs my daughter ever sang. Brilliant marketing tool. 
      
S   Coming Soon: a healthier, but still tasty version of McDick's chicken nuggets...


S

Sunday, May 16, 2010

Papaya & Black Bean Salsa


Since I had half of a papaya left over from making an invigorating papaya facial, I looked around for a recipe using papaya and found this this one in Salsa, Sambals, Chutneys And Chow-Chows


I love fruity salsa's and this one is really fresh and mild tasting. (Since I only had half of a papaya, I quartered the recipe and it made just the right amount for myself and three play-date moms).

What you'll need:
  • 1 C cooked or canned black beans
  • 2 ripe papayas, peeled and seeded, diced small
  • 1/2 red bell pepper, diced small
  • 1/2 green bell pepper (I used yellow), diced small
  • 1/2 red oncion, diced small
  • 3/4 C pineapple juice
  • 1/2 C lime juice (~ 4 limes)
  • 2 Tbsp ground cumin
  • 1 Tbsp minced red or green chile pepper of your choice (I used red)
  • salt
  • fresh cracked black pepper
In a large mixing bowl, combine ingredients and mix well. This salsa will keep, covered and refrigerated, for 4-5 days. 


Saturday, May 15, 2010

Papaya Facial

"Fruit of Angels" (Christopher Columbus)

    Turns out papayas are magical fruits. Not only are they rich in proteolytic enzymes (enzymes that aid the digestion of protein), many claim they have rejuvenating properties, especially for the control of premature ageing. I personally had never given any thought to papayas until I came across the recipe for an exfoliating facial in Lisa Johnson Mandell's Career Comeback: Repackage Yourself to Get the Job You Want (I recently notified my boss that I will not be returning from maternity leave, prompting an immediate run to the library for literature on careers. Early mid-life crisis you ask? I'll get back to you).


    Papaya Facial 

      I used half of a papaya to make this papaya facial (and the other half to make Black Bean and Papaya Salsa - stay tuned!). 

      1. Peel and remove the seeds from a ripe papaya

    2. Chop the papaya into small pieces and blend in a blender until smooth (you may need to stop the blender after a couple of seconds to scrape the edges down)
    3. Apply the facial to cleansed neck and face, but avoid eye area. Wait 15 - 20 minutes before rinsing with warm water.

    Do I feel like 5 years have been taken off my face? Not really, but my skin does feel fresh and soft and there is plenty left over for tomorrow. 


    Friday, May 14, 2010

    Pork & Apple Pita's

    Ease: 4/5     Taste: 3/5     Kids: 2/5     Time: 4/5


    I love meat/fruit combinations!


    Inspired by my "Mac Mishap", I thought this quick and fresh sounding recipe fit the bill. I enjoyed them, but they were difficult for my daughter to eat. Small hands just do not possess the finesse necessary to eat a pita (rolling it up works better!)

    My husband isn't a fan of a strong dill flavour (or any strong flavour for that matter), but if you are, you can double the sauce recipe.

    The recipe also called for alfalfa sprouts, but since I couldn't find any (yes, I only went to one store but with two kids, would you go to a second?), I used a packaged "broccoli slaw" that I found. It gave a similar crunch and texture, and was probably more nutrient packed than sprouts anyway. Broccoli slaw is my new favourite salad topper!

    What you'll need:
    • 1 pound boneless pork tenderloin, trimmed of fat and cut into 1/4 inch slices 
    • 3 Tbsp nonfat plain yogurt
    • 1/2 tsp dill seeds
    • 1/2 medium cucumber, chopped
    • 1 apple, cut into thin slices
    • 2 large lettuce leaves (I had green leaf that needed to be used up)
    • alfalfa sprouts (or broccoli slaw!)
    • red onion (optional)
    • whole wheat pitas, cut crosswise
    Trim the pork of visible fat. Cut the meat crosswise into 1/4 inch thick slices. Then cut each slice into 1 inch strips. Let the pork finish thawing if you cut it slightly frozen.

    In a small bowl, mix together the cucumber, yogurt and dill. Chill until pork is ready.

    Lightly spray a medium-sized nonstick skillet and preheat over medium-high heat. Place the pork in the skillet and cook for 2-3 minutes, or until completely cooked.

    Line each pita half with yogurt sauce, apple slices and lettuce. Fill with pork strips, broccoli slaw and top with onion if desired (no raw onion lovers in this household).

    I got about 5 stuffed pitas out of this recipe.

    Recipe inspired by Karen Bellerson's Pork & Apple Pita recipe in Low Fat, No Fat Cooking

    Thursday, May 13, 2010

    Mac Mishap...

    This could happen to anyone, right?


    I had a moment where I considered blaming this on my daughter...


    I use a Mac. I love my Mac. However, as other Mac owners know, you can't see the slots for your camera cards or CD's that are on the side of your monitor. The slots are also very close together.  I went to stick my camera card into it's allotted slot, and instead sent it flying into the CD slot. Turns out that picking your monitor up and shaking it won't work in this situation. I also couldn't figure out the magical way the monitor is held together.

    Talk about feeling like a dummy. So into the doctor the computer went. Thankfully, the fine people at Apple did not laugh at me and it was a quick fix. My husband letting me live it down however, won't be as quick a fix.

    Stay tuned for Pork and (Macintosh) Apple Pitas, inspired by this incident.

    Tuesday, May 11, 2010

    Strawberry Passion Martini

    What are you passionate about? This is one of the things you are supposed to ask yourself when thinking about choosing a vocation. Sounds so simple. Why is it so obvious to some people while the rest of us think anything from dog walker to pharmacist sound like good career options? There are lots of jobs I’d be good at. I know I’d be a kickass receptionist (seriously), and I also think I’d be really good at naming paint colors but I’m not sure either of those would elicit my elusive “passion”.

    I officially told my boss that I am not returning to work. I had a lovely government job with great benefits and flexible working hours. Only problem was, it wasn't in the town we now reside in. So for the first time since graduating University I find myself officially unemployed. This drove me to spend an embarrassingly long amount of time on the internet taking career quizzes only to find that I apparently lack passion.

    At least I found a worthwhile use for passionfruit...

    What you'll need:
    • 1 oz light rum
    • 1 oz strawberry-passionfruit juice (or any passionfruit juice)
    • 1 oz lime juice
    • 1 tsp powdered sugar
    • ice
    Mix ingredients together over ice and strain into glass.

    Great to enjoy on the patio with a friend (while simultaneously drowning your career anxieties away). 


    Monday, May 10, 2010

    Rethinking Jello-Molds


    This video has been circulating among my friends lately, and not only did it make me laugh, it made me question my assumption that jello-molds are a thing of the past. I thought jello-molds were only used as gags, theme decoration or as a fun retro dish at an 80s party. But maybe I should know how to make one in order to "perfect my tricks"? I haven't seen one at a recent BBQ or baby shower, but maybe I'm missing out.

    According to Wikipedia, jello-molds were popularized in the Victorian era - much longer ago than I would have guessed (as an aside, apparently "celery" was once a gelatin flavour. Can't imagine why that one would be discontinued...). As recent as 1998, an entire book was published on the matter (The Joy of Jell-O Molds: 56 Festive recipes from the classic to the contemporary). That's more recent than I would have thought for a book on jello molds.

    I happened to stumble upon a rather fun blog all about jello molds (who knew so many things could taste good congealed!). But aside from the small pockets, tell me, do people still make these?


    Sunday, May 9, 2010

    Cheater French Toast

    Ease: 5/5     Kid-friendliness: 5/5     Taste: 5/5     Time: 5/5


    Easiest French Toast!


    Here's hoping the mother's out there were properly celebrated today for the true heros that you are (My daughter came and wished me a "Happy Valentine's Day", but I felt special nonetheless).

    110 years ago, approximately 44 hours a week were spent on preparing meals and cleaning up after them (Bowers, 2000)! Yuck. Post- World War II, most magazines portrayed the ideal wife as, "intelligent and well-educated, could cook delicious meals, did housework efficiently, and spent lots of time nurturing her children." (Bowers, 2000). This doesn't really sound all that different from the ideal wife in many of today's popular magazines, does it? (Only, in addition to the above she also has an exciting career and makes her delicious meals from scratch using nothing but organic, locally produced ingredients). A tall order! Before letting myself get all anxious about how far from the ideal I am, I made incredibly simple, but absolutely delicious cinnamon french toast for Mother's Day brunch with my Mother-in-law. It's not particularly low fat, not organic, and not locally produced, but when you see how easy it is to make, and how good it is to eat, you'll still feel like a rock star in the kitchen! I've tried a variety of methods for making french toast and it usually ends up soggy. This version is hands down the best yet.


    What you'll need:


    Raisin Cream Topping


    • 1/3 C sultana raisins
    • 1 C boiling water
    • 1 C whipping cream (I used low fat)
    • 2 Tbsp instant vanilla pudding powder (I used light)
    • 1/4 tsp ground cinnamon
    Stir raisins and boiling water in small bowl. Let stand for 10 minutes, until the raisins plump up. Drain and blot raisins with paper towel. Cool. 

    Beat whipping cream, pudding powder and cinnamon in medium bowl for two minutes, until soft peaks form. Fold in raisins. Set aside until french toast is cooked. 


    Cinnamon French Toast
    • 3 large eggs
    • 3/4 C milk (I used skim)
    • 1 tsp vanilla
    • 1/4 tsp salt
    • 1 tbsp hard margarine or butter
    • 6 day-old cinnamon buns without icing, cut horizontally into two layers
    Preheat oven to 200F, then turn off. 

    Beat the first 4 ingredients in medium bowl until smooth. 

    Melt 1/2 the margarine in large non-stick pan over medium heat until sizzling. Reduce heat to medium-low.

    Quickly dip the cinnamon bun halves, one at a time, into egg mixtures. Cook, about six at a time, approximately two minutes per side (until lightly browned). Keep warm in the oven until the remaining 6 buns are cooked. 

    Top with raisin cream topping. So good!

    Recipe from Weekend Cooking: 40 Menus for Casual Entertaining (Company's Coming Special Occasion)


    Bowers, Douglas E. "Cooking trends echo changing roles of women". Food Review Vol. 23, Issue 1(2000): 23-29 . 


    9UJR4Z8KYXRB 


    Friday, May 7, 2010

    Fiesta Chicken Salad

    Ease: 5/5     Taste: 4/5     Kid-friendliness: 3/5     Time: 4/5


    Black beans and corn = a good relationship

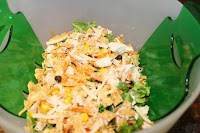
    Was feeling like something light last night and we're still all about getting use out of our "Broil King" (despite our winter-like weather), so hubby BBQ'd up a family pack of chicken for us. This is a quick easy salad to make but if you serve it as a stand-alone entrée, like I did, you'll have a pack of pantry raiders later on. It would thus be better served as a side or lunch entrée. On the plus side, you can use the remaining beans, tortillas, cheese and chicken to make wicked nachos!


    What you'll need:


    • 1 head green leaf lettuce (or lettuce of your choice), chopped
    • 1/4 C black beans, rinsed
    • 1/4 C corn, cooked 
    • 1 cooked (BBQ'd is especially nice) breast of chicken, lightly seasoned with tex mex spice
    • 1 medium carrot, grated
    • 1/4 C crushed tortilla chips
    • 1/2 C Tex Mex cheese
    Combine above ingredients in a large bowl. 

    Dressing:
    • 1/4 C salsa
    • 1/4 C ranch dressing
    Voila!

    Thursday, May 6, 2010

    Kitchen-inspired Mother's Day Ideas


    With Mother's Day right around the corner, I can't help but notice the increase in advertisements for such things as spa packages, appliances,  and jewellery for your mom. I enjoy the spa and something shiny as much as the next person, but I can't help but feel what many of us feel, and that's the commercialization of holidays. Did you notice that the Easter isle in Walmart this year, was bigger than ever?

    At the end of the day, what I want most is to know that I was thought of on Mother's Day, and to have my family spend a little time with me. I think Mother's Day, the same as Family Day or Father's Day, should promote connecting with loved ones, and not annoy people by reminding them they have to run out and buy yet another gift.


    So here are seven simple ways to make your mom feel thought of this Mother's Day:

    1. Cook your mom's favourite dish and have her over for lunch or dinner (pretty basic, but you can make it special by putting some real thought and planning into what you make)
    2. Compile yours, your mom's and some of your mom's mom's recipes if possible, into a recipe box or recipe binder (which you can easily decorate yourself for an added personal touch)
    3. Buy some fabric paint and decorate an inexpensive plain apron (enlist your kids for help!)
    4. Sign yourself and your mom up for a cooking class
    5. Start a little boxed herb garden that your mom can maintain in her kitchen
    6. Do a surprise clean-up in your mom's kitchen. Include tackling some of those more annoying jobs like shining up the kitchen sink and pots, organizing her cookbooks, tupperware drawer or pantry (unless she has a system going - never mess with a woman's system!); cleaning the fridge, and washing the windows
    7. Make your mom some homemade soup, lasagne or casserole and stock up her freezer to give her a few nights off from the kitchen
    Know of other simple ideas?

    FEVBWMMQPJTH

    Wednesday, May 5, 2010

    A Man's Shoe Store

    BBQ Country

    Although you wouldn't know it now, but in the not so distant past, we Albertans enjoyed  a bit of Spring. During that brief time, my husband and I went to a store dedicated entirely to BBQ’s and bbqing paraphernalia. This was a big store! It was all very masculine, with everything given names like “Grill Master” and “Broil King”. Like buying a $900 BBQ will turn you into some kind of Spartan of meat (Prepare for Glory!). There was an entire wall just for sauces. Who would have thought that a store for nothing but BBQ stuff could be a success? That guy is probably just raking it in. Wouldn’t it be awesome if it turned out to be owned by a woman?

    My husband ended up picking out a BBQ, and is now a proud "Broil King".

    Stay tuned for (BBQ'd) Fiesta Chicken Salad...


    Monday, May 3, 2010

    Chicken Vegetable Soup

    Ease: 3/5     Taste: 5/5     Kid-friendliness: 4/5     Time: 2/5


    Family: 0; Nasty Cold: 4
    Don't hide away the soup recipes just yet...


    For me, nothing says Spring like the arrival of a bad cold. And one has hit our household. I find soups to be a little high maintenance in terms of prep work, but they are sometimes worth it. They are a way to get vegetables into your children (admittedly, I often have to bribe my daughter with a grill cheese sandwich), you can make a ton and they usually freeze quite well. Which means the next time you catch a cold, you'll have some great homemade soup on hand to perk you up and give you a deserved night off in the kitchen.


    Mine looks a lot more minced up than yours probably would. That's because I chopped the vegetables really fine so that my poor snotty nine month old could eat it too.


    What you'll need:
    • 8 C chicken broth (or stock if you've recently made a roast chicken and made stock from it)
    • 1 pound cooked chicken breast, cut into bite-sized chunks; if you haven't recently made a roast chicken, Lillydale does make packaged cooked chicken breast chunks now. Super convenient! Great for sandwiches too. 
    • 1 large onion, coarsely chopped
    • 1 large garlic clove, minced
    • 2 medium stalks celery, coarsely chopped (include tops)
    • 4 medium potatoes, peeled and cut into bite sized cubes
    • 2 large carrots, sliced
    • 1 tsp poultry seasoning
    • 1 tsp crushed dried thyme
    • 2 tsp crushed dried basil
    • 1 large bay leaf
    • 8 black peppercorns
    • onion salt to taste
    • 1 1/2 C frozen peas
    Place the broth in a large soup pot, and bring to a boil. Boil for 1 minute, and reduce heat to medium. 

    Add the chicken, onions, garlic, and celery to the pot and stir to mix. Cover and simmer over medium heat for 15 minutes.

    Stir in the potatoes, carrots, and seasonings. Cover and simmer for 30 minutes.

    Stir in the peas, cover, and simmer for 15-30 minutes or until the vegetables are tender. 

    Remove and discard the bay leaf. Serve and enjoy!


    Recipe inspired by "Turkey Vegetable Soup" in Karen Bellerson's Low Fat, No Fat Cooking

    Sunday, May 2, 2010

    Goopy Woes

    My 9 month old son is teething. I've been through teething before, and my daughter had a rough go but I really feel for the poor guy. He's not cutting one tooth, he's cutting four or five right now. Two are finally out, and I can see two, possibly three more just under the surface. To top it off, he's got a gruesome cold. You add watery eyes and fun sticky snot to the copious amounts of drool and you've got a fine mess.

    I know to expect that as soon as you get a Spring-time pedicure, dig out the flip-flops and roll out the BBQ, Mother Nature will rage on you and leave you in a puddle (or snow bank if you live in the Canadian Prairies like we do) with nothing but a cold to show for your warm weather optimism.

    If you're feeling a little under the weather so-to-speak, stay tuned for Chicken & Vegetable Soup. It's warm hugginess is great for the whole family.
     
    Creative Commons License
    This work by www.lucyssoupcan.com is licensed under a Creative Commons Attribution-Noncommercial-No Derivative Works 2.5 Canada License